
Are you looking to combine two monitors into one extended display on your Windows 10 or 11 computer? This article is your go-to guide for achieving that setup with ease.
We’ll walk you through the straightforward steps to expand your digital workspace, enhancing both your productivity and computing experience.
Let’s dive in and transform your workspace with this practical solution.
The Straightforward Way: Using Windows Settings
If you’re looking to combine two monitors into one extended display using Windows 10 or 11, here’s a clear and concise guide to help you achieve that without any frills.
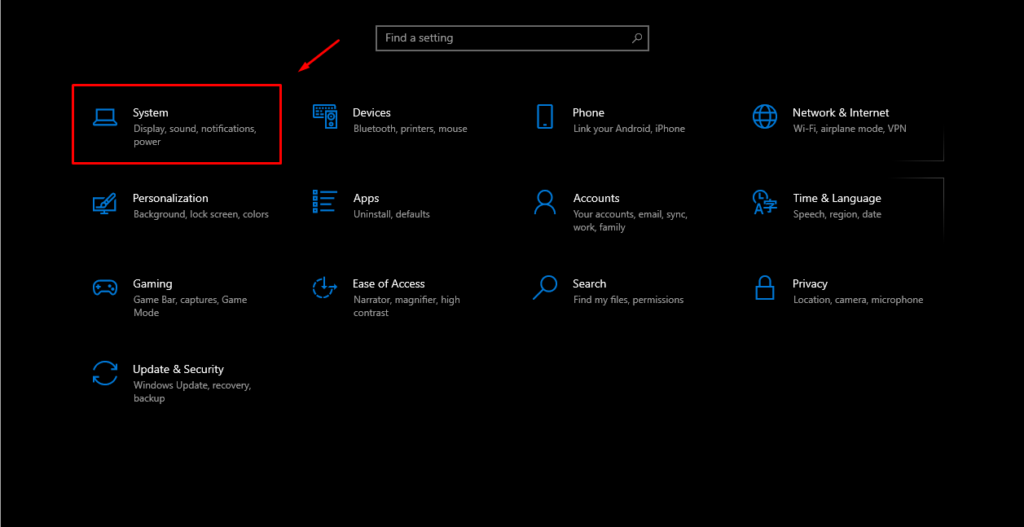
First, let’s tackle the straightforward method using Windows settings. Begin by clicking on the Windows search bar located at the bottom left of your screen. Here, you’ll type in ‘Settings’ and open the application.

Once in Settings, navigate to the ‘System’ section.
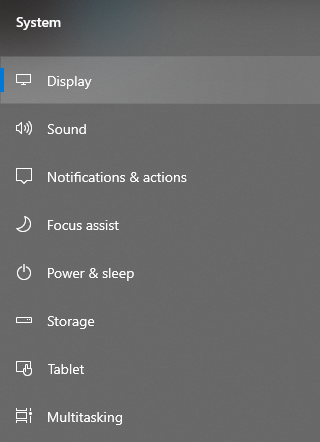
In the System menu, look for the ‘Display’ option, which should be the first choice on the list and usually opens by default.
In the Display settings, scroll down until you see ‘Multiple displays’. Click on that and select ‘Extend these displays’ from the available options.
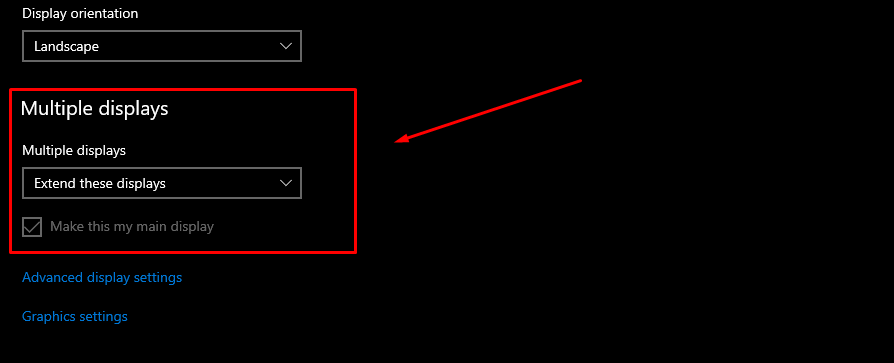
Additionally, within the same Display settings, you also can choose which monitor serves as your primary display. This can be useful for organizing your workspace according to your preferences.
The Quick Access Method: Keyboard Shortcut
For a quicker method, especially if your primary monitor is already set up, there’s a handy keyboard shortcut.
Simply press the Windows key and “P” simultaneously. This shortcut brings up a menu on the right side of your main screen.
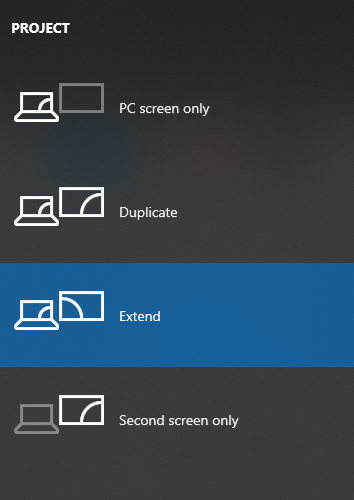
From this menu, choose “Extend”. Your screens will briefly flicker, a normal part of the process, and then stabilize as one extended display.
Customizing Your Display Arrangement
Once you’ve set up your dual monitors as an extended display, you can further personalize your workspace by arranging the monitors to match their physical setup. This ensures a nice transition of the cursor and windows between screens.
Here’s how to do it:
- Access Display Settings: Go back to the Display settings in the Windows System menu.
- Rearrange Monitors: You’ll see a visual representation of your two screens. These are labeled as “1” and “2”.
- Drag to Position: Click and drag these boxes to arrange them as they are physically placed on your desk. For example, if your second monitor is on the left of your main monitor, simply drag screen “2” to the left side of screen “1” in the settings.
- Apply and Confirm: After arranging them as desired, click ‘Apply’. Move your mouse across the screens to ensure the setup matches your physical layout.
This customization not only enhances your workflow but also provides a more intuitive and comfortable experience when navigating between multiple monitors.
PS: If, while combining your monitors, you accidentally zoom in on one of them, there’s no need to worry. We’ve got an article dedicated to solving this exact issue.
Conclusion
We hope this guide has made it easy and straightforward for you to combine two monitors into one extended display on your Windows 10 or 11 system. Please drop a comment below sharing which method you used and how it enhanced your everyday experience.
Also, if you’ve successfully set up your dual monitors, you might be interested in our next article: “How to Take a Screenshot on a Multi-Monitor Setup.” This guide will be equally simple and helpful, offering you another handy skill to make the most of your new extended display.
We're an affiliate
We hope you love the products we recommend! Just so you know, gameraround.com is a participant in the Amazon Services LLC Associates Program, an affiliate advertising program designed to provide a means for sites to earn advertising fees by linking to Amazon.com.