
Are you looking to disable the DPI (Dots Per Inch) button on your Logitech mouse? Maybe it’s getting in the way during your gaming sessions or everyday browsing.
Whatever your reason, I’ve got a straightforward guide to help you through the process using the Logitech G Hub software.
In this guide, we’ll be using the Logitech G502 as our example to walk you through the procedure step-by-step. So, let’s dive right in and get started!
Step 1: Download and Install Logitech G Hub

First things first, you’ll need the Logitech G Hub software. This tool lets you customize your Logitech G devices, including your mouse. Head over to Logitech’s G Hub page to download it. Once downloaded, follow the installation instructions.
Step 2: Launch Logitech G Hub
After installing, open the Logitech G Hub software. It should automatically detect your Logitech mouse. You’ll see an image of your mouse on the screen. Just double-click on it to get started with customizations.

Step 3: Navigate to Assignments
On the left side of the screen, you’ll see a menu. Click on “Assignments”. This section lets you change what each button on your mouse does.

Step 4: Select the Right Profile
Now, look at the top right of the Logitech G Hub window. You’ll see your current profile. Once you click on it, you’ll get a list of profiles where you can set different button configurations for different games or general desktop use.

- For Specific Games: Choose the profile named after the game you’re customizing.
- For Desktop: Select the “Desktop” profile.
- For All Profiles: You’ll need to repeat these steps for each profile you have.
You may also like: Logitech G502 Alternatives in 2024
Step 5: Disable the DPI Buttons
First, click on the DPI button you want to disable.

A menu that pops up, choose “Disable”. This will stop the button from changing your DPI settings.
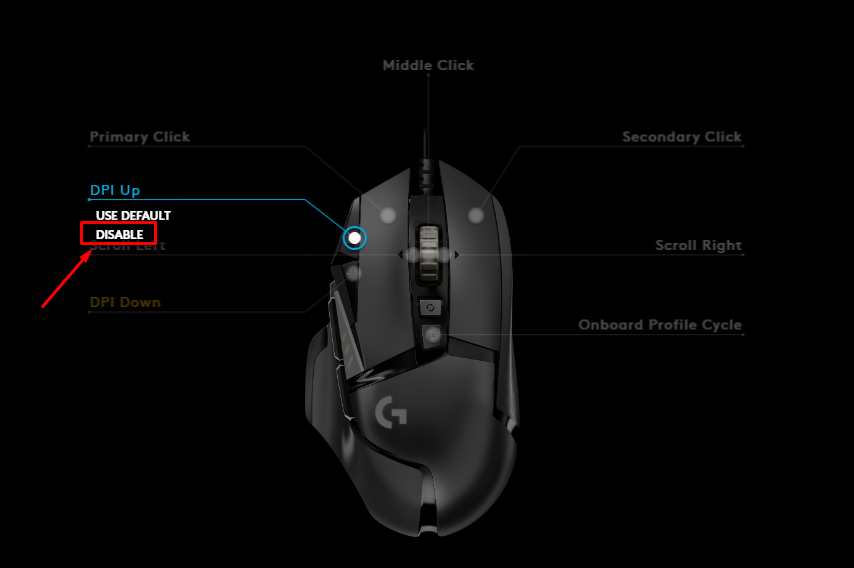
Don’t forget to do the same thing with the DPI Down button.
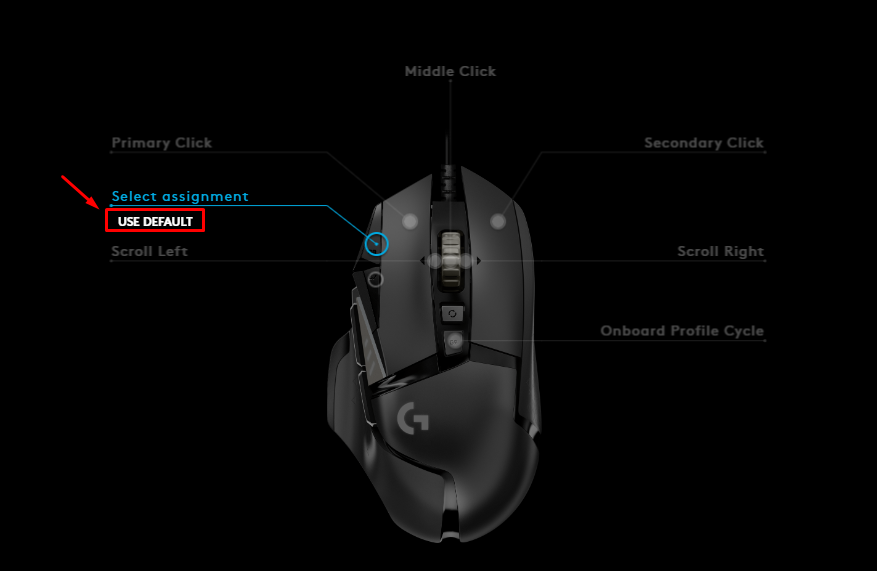
Step 6: Restoring Default Settings
Changed your mind? No problem. Click on the DPI button again in the Logitech G Hub, and simply select “Use Default” to bring back its original function.
And that’s it! You’ve successfully customized the DPI settings on your Logitech mouse. Now, you can enjoy your games or work without any accidental DPI changes.
What if Your Game Isn’t Listed in the Profiles?
If you’re scrolling through the profiles in Logitech G Hub and don’t see your game, there’s a straightforward solution.
Simply click on your current profile. Then, look at the bottom of the menu and click on “Manage profiles”.

Here, you’ll find an option to “Scan now”. Click on this, and the software will search for any newly installed games on your computer.
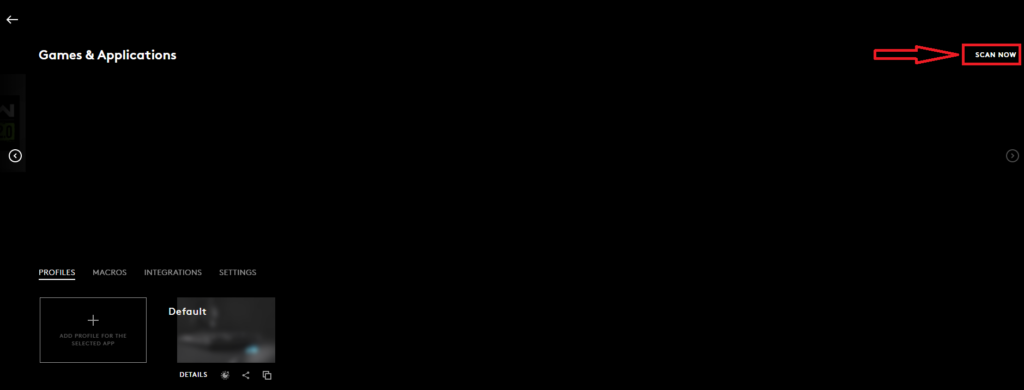
Once the scan is complete, your game should appear in the list of profiles, ready for you to customize its settings as needed.
PS: Check out this article if you wish to also disable your scroll wheel.
Conclusion
I hope this guide has made it easier for you to customize your Logitech mouse to suit your needs. If you found this article helpful, or if you have any questions, don’t hesitate to drop a comment below.
Your feedback and queries are always welcome, and I’m here to help with any further mouse customization tips you might need.
We're an affiliate
We hope you love the products we recommend! Just so you know, gameraround.com is a participant in the Amazon Services LLC Associates Program, an affiliate advertising program designed to provide a means for sites to earn advertising fees by linking to Amazon.com.